Over the last year and a half we’ve spent countless hours wandering through the aisles of hardware stores or poring over technical specs of online retailers. The following is a rough list of what actually made it into our van over the course of converting our 2005 158” wheelbase T1N Sprinter van. The van came to us as a FedEx delivery cargo van. The nice Ukrainian man whom we bought it from took out the cargo shelves and the cabin divider, the rest we did ourselves. This list doesn’t include the many things which we scrapped, didn’t use, or threw away. Whenever we came up with an overly complicated solution, it resulted in extra purchases and wasted time and money (ask us about refrigerators if you meet us). The motto for a vanbuild should be “Keep it simple, silly!” – there are already too many things to make life difficult to get overly creative!

Also, a note on tools: We bought good tools after spending months struggling with inadequate tools. Eventually we borrowed and acquired second-hand tools that were key to making the buildout actually happen. This made everything else easier and faster. Get good tools and learn how to use them well!
Tools:
- Makita tracksaw with track – if you’ll just be on battery power, check out the battery powered version
- Makita drill & driver combo (2Ah batteries are sufficient; we got a reconditioned set)
- Ryobi variable-speed Jigsaw with blades for sheet metal, detailed wood cutting, and fast hardwood cutting (or if you’re going all-Makita battery powered, check out this lithium-ion Makita version)
- Chop saw (mostly used for cutting 2x4s, knotty pine panelling, and trim)
- Nail gun with compressor
- Several sets of drill bits – these get dull and break from the sheet metal- stock up!
- Hole saws in 7/8”, 2”, and 2 ¼” sizes
- Kreg Pocket Hole Jig (used for our bedside cabinets; if you’re going to use pocket holes for all of your cabinetry I’d recommend getting a full K4 Kreg jig kit, as aligning the holes with the mini jig is time-consuming)
- Shop vacuum (or if you’re going all-Makita, a cordless vacuum)
- Orbital sander (good for all-around and detail work) or belt sander (good for smoothing rough wood)

Galina happily using the track saw. We used a scrap wooden door to cut on.
Insulation:
- FatMat Rattletrap soundproofing, 80mil x 25sq ft (not a lot, just small squared on the larger sheet metal panels in the van)
- 5 large rolls, Reflectix radiant barrier
- 3 cans, 3M spray adhesive
- 4 panels 1.5” 4ftx8ft foam board (large wall gaps and ceiling)
- 3 panels 0.5” 4ftx8ft foam board (floor)
- 12 rolls UltraTouch denim insulation batting (this stuff is awesome!)
- 2 cans “Great Stuff” spray foam insulation
- 2 rolls, 1.5mil polyethylene sheeting
- Packing tape

Interior:
- 9 sheets 1/8” MDF board (ceiling, garage walls, cabinet back walls)
- 1 sheet, 4’x8’ 1/2” chipboard for wheel well boxes
- 75” quarter-round oak strip for wall/ceiling corner
- Primer and paint
- 3 boxes, adhesive vinyl flooring tiles (put these down before cabinets)
- Knotty pine paneling:
- 24 boards, 3/8” knotty pine paneling
- Varethane polyurethane coating
- 20ft 3/8” x 1” strip, screwed into metal to provide backing for knotty pine
- 200 #6 x 5/8” brass screws
- 200 #6 brass finishing washers
- 4 sheets, foam core poster board to fill 3/8” air gap in areas used as back support


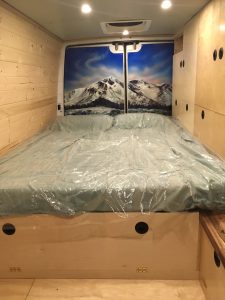
Bed platform:
- 2 4’x8’ sheets, 0.75” plywood
- 2 4’x8’ sheets, 0.5” plywood
- 1” wood screws and liquid nails for fastening plywood sheets into a bed-size 1.25” thick platform
- 2 pieces, 69” long 1.5” steel C-channel from a steel supplier
- 2 2x4s, cut to length
- 10 riv-nuts and appropriate size lag bolts

Cabinets:
- 7 sheets, 5’x5’ pre-finished (including polished veneer) Baltic birch plywood
- Acacia butcher block countertop, 1.5” x 25in x 8ft (Williamsburg Butcher Block Company / Lumber Liquidators). Cut to 22in wide, mounted above 29.5” to be able to accommodate refrigerator
- 12 slam latches
- 10 sets Liberty non-mortise surface-mount hinges (Home Depot)
- Magnetic latches for doors (Home Depot)
- Assorted small hinges, door handles, and latches (Home Depot)


Plumbing:
We talked with a variety of people who had used hand-pump systems, all of whom converted to electric pumps after a season in the van. We still use a 6-gallon water jug from K-mart with a 1-gallon milk jug for graywater, but may upgrade in the future.
- Stainless-steel ‘bar-prep’ sink (i.e. small sink)
- Single-handle stainless steel Faucet
- Shurflow variable-speed pump
- Seaflow accumulator
- Hoses and elbows bought from local hardware store (note: we bought a pre-made hose kit, which ended up leaking- just make your own!)
- Plumber’s putty, Teflon tape, washers
Electrical:
Our batteries are mounted underneath the driver and passenger seats (one under each seat). This created constraints on the space available, required rearranging the existing electronics, and generally made things more difficult. For Sprinter T1N owners, the alternatives are to limit yourself to <125Ah of capacity or get a custom-welded battery tray underneath the body of the sprinter. For Sprinter 2007 onward (NCV3) vans, there is a tray in the engine compartment for an auxiliary battery which can accompany two 6V 250Ah batteries in series, creating a 250Ah 12V battery bank. We don’t have a fuse board; this would be have been very wise and helpful for connecting new appliances. One precautionary note: the power draw of some appliances (inverter, starting current of refrigerator) can cause a significant voltage drop if you don’t use sufficiently large cables.
- Two 12V 125ah AGM lead-acid batteries
- Lengths of OO welding cable to join batteries (bought at custom length from a regional welding shop)
- 10W 12V LED lights
- 15ft, 12V LED strip lighting
- Various fuse holders
- 18AWG wire for wiring lights, outlets, etc
- Light switches – two 3-way (SPDT) switches for rear lights, otherwise simple SPST switches
- 200W Renogy solar kit with 20A MPPT charge controller (or the slightly less efficient PWM charge controller option)
- Splitter connector to allow solar panel coupling in parallel for shaded applications
- Extra 6AWG cabling to connect solar to batteries
- Solar system monitor/meter -not necessary if you get a charge controller with an LCD display which shows state of charge
- 3M VHB Tape 5952 for attaching solar to roof (7ft is probably sufficient)
- Blue Sea Automatic Charge Relay (some way of linking the battery with alternator is critical if heading north in the winter; a simple manual switch would also be sufficient)
Appliances:
- MaxxAir 00-05100K fan (rain-proof – in hindsight, we would have probably gotten two of these)
- MaxxAir 00-04500K fan (rain-sensing; should have bought with a fan installation kit including putty for the fan borders)
- Dometic CRX80 refrigerator (Isotherm Cruise 85, Isotherm 100, and Dometic CRX110 also were top contenders)
- SureSine 300 inverter (in hindsight would get a higher-powered modified sine wave inverter; the SureSine is not useful for much other than charging laptops and drills)
- Planar 2D-12 heater (2kW thermostatically controlled diesel-fueled heater, based on a design similar to Webasto/Espar, Snugger, and HappyBuy units)


Softgoods:
- Ripplewear blackout curtains for all windows. We tried making window coverings ourselves with reflectix, magnets, and black cloth, but it proved to be very difficult and was worth it to order them
- Seat heaters (haven’t needed yet, as we keep the van heater running in the winter)
- Seat covers (as we traveling with two dogs, we should have bought gray not black)
- Cabinet Seat cushions: Foam and covering material. We Tried sewing these on the evening of our departure, but ended up using hot glue to put them together instead. They have held up so far, but will likely need to be made anew fairly soon. We still need to add some velcro on the bottoms to attach them to the cabinets securely.
- Blackout curtains to separate cabin area from living area. Used some old curtain material we had and just sewed to fit. Attached snaps to snap them closed as well as to the sides of the van.
- Kitchen window curtain
- 10ft, bungee cord material and 20 bungee cord end pieces for custom-length bungees
Garage and gear storage:
- Eye bolts and bungee cords
- 8ft, 1.5” aluminum angle extrusion for restraining
- 7 six-inch shelf brackets for ski storage
- Bike storage mounts

Miscellaneous:
- Windows:
- One Peninsula Motion Glass window for behind-driver panel (SKU 158-2) as we wanted to be sure we had a bug screen in the opening window
- 1 CR Lawrence sliding door window
- Tires: BF Goodrich T/A K02
- Chains– match the tires; we were recommended to avoid any rubber or cables in the chains so went with the cam-link system.
- Swivel Seat, passenger side
- New radio (our van did not come with a radio; simple Pioneer radio with two dash-mounted 4” speakers)
- Backup camera (came with van)
- Fruit hammock– ever-present on live-in vans!
- Climbing holds backed with plywood for the back door to get to the roof